07958578737
Call now



Ideal Logic & Independent boiler servicing in Crystal Palace, Norwood and South London
posted on 09 Dec 2018I am a registered gas engineer specializing in Ideal boiler repairs, servicing and installation. I am based in Upper Norwood and provide boiler repairs and servicing in Crystal Palace, Norwood, Streatham and South London.
This post describes a typical service to a combi boiler based on a very popular boiler: Ideal Logic+
The service procedure is identical for other ideal boilers: Ideal Independent, Ideal Classic 2 and Ideal Atlantic
- Inspect all pipework and flue run internally and externally for signs of leaks or stress to components
- Inspect boiler and controls for correct operation on hot water and heating
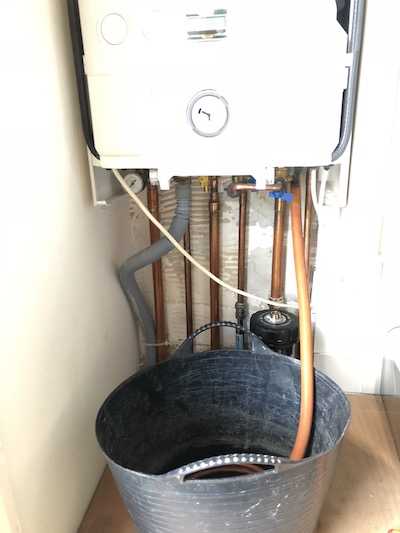
- Isolate boiler flow and return valves. Attached rubber hose to a drain point under the boiler and drain down the boiler. Boiler being drained down on a picture below
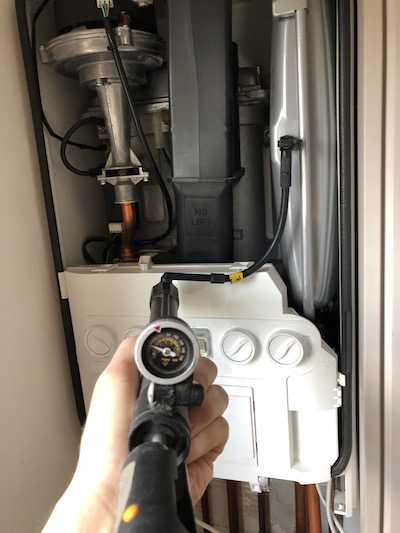
- Keep hose attached and drain point open. Undo cover on expansion vessel valve and test the vessel pressure. If required repressuirse the vessel. On completion test vessel valve for leaks. Reseal with plastic cap. Picture below show expansion vessel being repressurised.
- Magnetic filters – if there is a magnetic filter present on the system isolate it, remove cover and clean the filter. Check quality of system water for signs of corrosion
- Once filter is cleaned and expansion vessel repressurized turn off drain point, remove drain hose, turn isolating valves on and repressuirse the system to correct pressure
- Remove boiler front cover. Visually inspect inside the boiler for signs of leaks or distress to internal components
- Disconnect no.2 plugs from the fan. Remove plastic flue manifold by removing sump cover first and gently lifting it up
- Remove no.1 bolt from the fan and no.4 bolts from the burner top
- Remove fan and burner from the heat exchanger
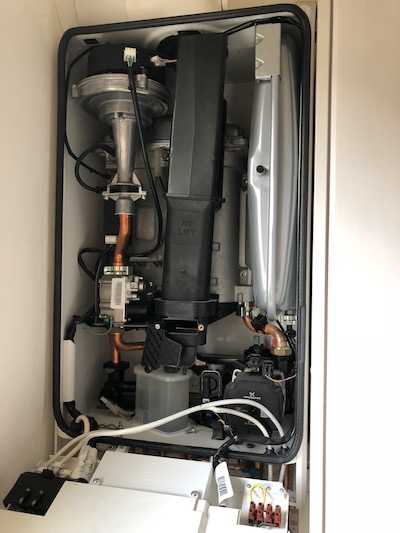
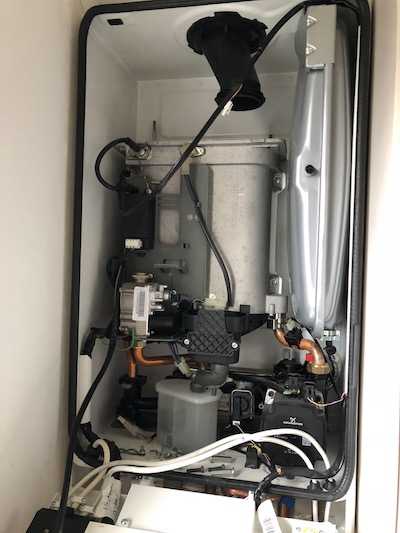
- Picture below shows inside of the boiler with fan, burner and flue manifold removed and sump cover installed back to prevent spillage of water when flushing main heat exchanger
- Inspect fan and fan venturi for blockages and clean
- Inspect burner and clean if needed
- Inspect electrodes and clean
- Inspect inside of combustion chamber and flush with water. Remember to re fit sump cover as otherwise you can flood the boiler inside.
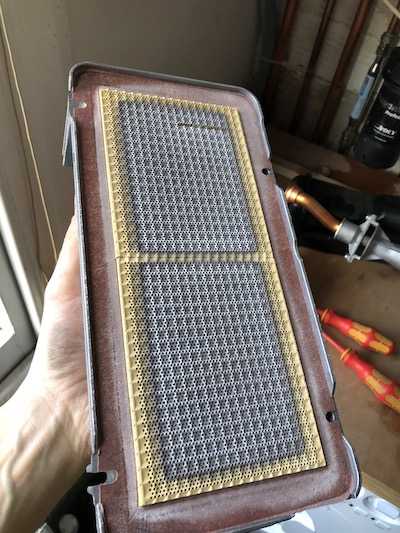
- Picture below shows main burner after brushing off deposits
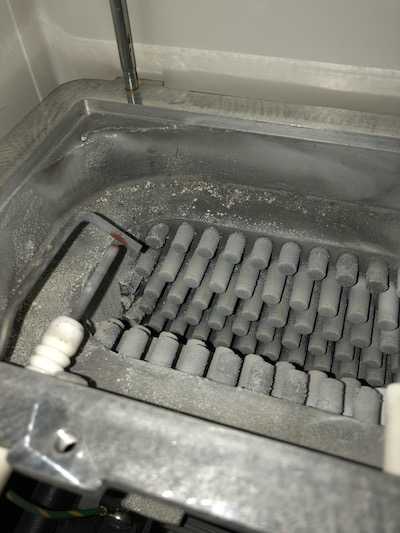
- Clean main heat exchanger by pouring water though it and brushing off deposits. Picture below show main heat exchanger before cleaning
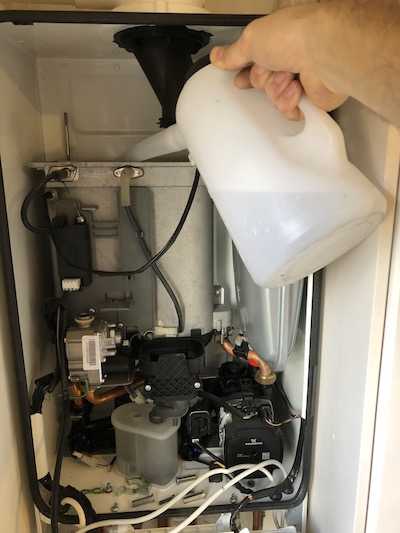
- Cleaning to main heat exchanger. For this I use a 2 liters container with a very long spout and a screw on top to avoid accidental spillage. Depending on how dirty the heat exchanger is I will pour between 4-10 liters of hot water through it. It helps to have a small brush to brush off deposits from heat exchanger
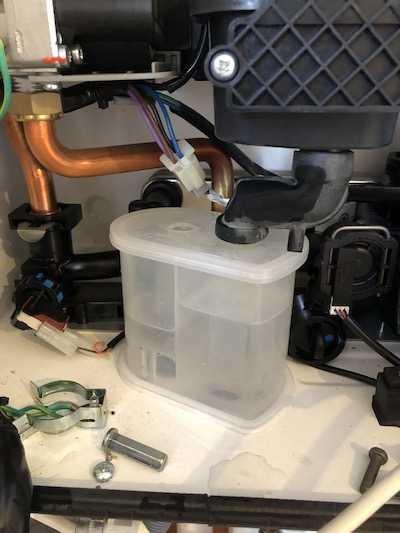
- You can see deposits being flushed through the sump into condensate trap. (White semi transparent box left to the pump). Once water coming though the sump is clean it means main heat exchanger deposits have been flushed
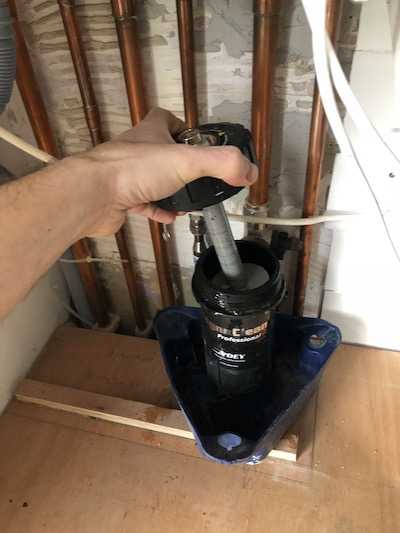
- Next step is cleaning to the trap itself. It is not always required as flushing to main heat exchanger will also flush the trap. In case it still needs cleaning trap can be removed and cleaned under running water. Picture below shows a clean trap
- Now it is time to install back main burner, flue manifold and fan. Sump cover needs to be removed again for flue manifold installation
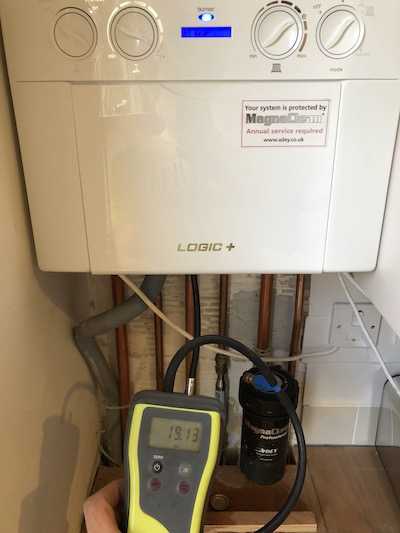
- With boiler assembled and front cover in place it is time to test boiler inlet working pressure at maximum rate. I will also gas rate the appliance at the same time and connect my gas analyzer to confirm correct combustion at maximum rate at the same time
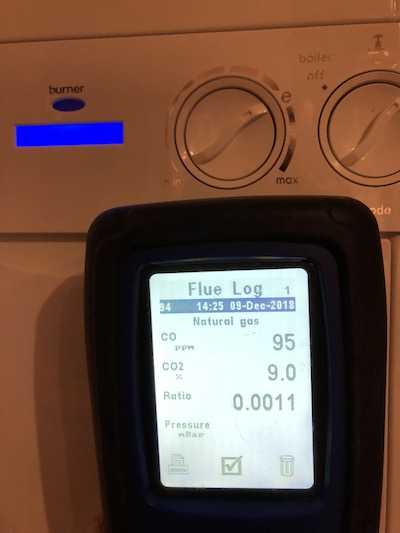
- Combustion test at maximum and minimum rate
- If gas pressures, gas rate, combustion results are all within expected results fill in paperwork and adjust settings on the boiler and programmer. Print out combustion results and attach to service certificate. Issue service certificate
Summary of servicing procedure to Ideal Logic combination boiler:
- Visual checks to pipework, flue, components of the boiler, flue and combustion seals including flue manifold seals
- Checks for correct operation on hot water and heating to boiler and controls
- Clean filters and inspect system water for signs of corrosion
- Expansion vessel check and repressurize if required
- Expansion vessel valve check for leaks
- Fan and fan venturi checks and cleaning
- Burner checks and cleaning
- Main heat exchanger cleaning
- Condensate trap cleaning
- Gas pressure checks
- Gas rate check on maximum rate
- Combustion checks on maximum and minimum rate (when possible)
- Combustion adjustment (when possible) – Ideal Logic has non-adjustable gas valve
- Issue Gas Service CertificateFor Ideal boiler repairs and servicing in Crystal Palace, Norwood, Streatham and South London please book your boiler service here


